WebMCP Declarative API: How to Turn an HTML Form Into an AI Agent Tool
With four HTML attributes, an ordinary form can become a tool AI agents understand. This step-by-step tutorial shows how, and where the approach still falls short.

In this article
- What does the WebMCP declarative API do?
- The four WebMCP declarative API attributes
- Step 1: Start with a working form
- Step 2: Name and describe the tool
- Step 3: Describe each field
- Step 4: Decide whether the agent can submit
- Step 5: Return a result from the declarative API
- Step 6: Show people what the agent is doing
- Where the WebMCP declarative API fits best
- Step 7: Test before you rely on it
- Limitations of the WebMCP declarative API
- A quick WebMCP declarative API checklist
- WebMCP declarative API: FAQs
- Sources
WebMCP declarative API: the short answer
The WebMCP declarative API turns an ordinary HTML form into a tool that AI agents can use, with no extra JavaScript. You add a toolname and tooldescription to the form, and a toolparamdescription to each field. By default, the agent fills the form and the person clicks Submit. As of September 2026 it is experimental, works in Chrome’s WebMCP trial, and is not supported by ChatGPT’s site tools.
The WebMCP declarative API is the simplest way to make part of a website usable by AI agents. If your site has a search form, a booking form or a contact form, you may be able to expose it as a tool by adding a few HTML attributes. There is no need for a separate server or a new app.
This tutorial explains how it works, step by step, with examples you can adapt. It is written for site owners and developers who know basic HTML. It is based on Chrome’s declarative API documentation and the WebMCP project’s explainer, checked in September 2026. Because the standard is still a draft, details may change. If you’re new to the topic, start with what is WebMCP.
What does the WebMCP declarative API do?
Normally, an AI agent fills in a form the way a person does. It finds each box, types into it and clicks the button. That is slow. Also, it can go wrong if the form changes.
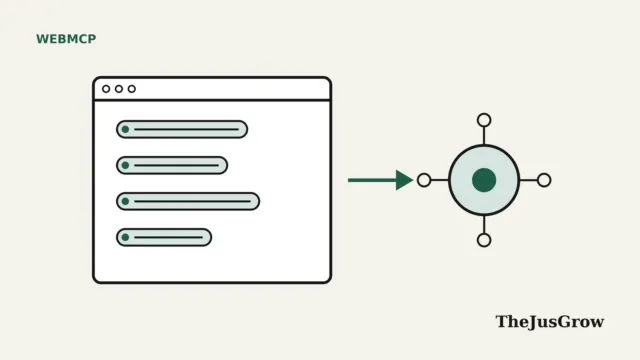
With the WebMCP declarative API, the form describes itself. Then the browser reads your new attributes and builds a tool definition from it. As a result, a supporting agent can see a tool such as search-cars, understand what each field means and fill it in directly.
The explainer describes the declarative approach as a way to create tools from standard HTML forms “without JavaScript.” By contrast, the imperative API uses JavaScript to register tools, and it suits more complex actions. We cover that in our guide to the WebMCP imperative API.
The four WebMCP declarative API attributes
The declarative approach adds four HTML attributes, according to the explainer and Chrome’s documentation:
| Attribute | Goes on | What it does |
|---|---|---|
toolname | The <form> | Names the tool the agent will see |
tooldescription | The <form> | Explains in plain language what the tool does |
toolparamdescription | Each input, select or textarea | Describes what that field expects |
toolautosubmit | The <form> (optional) | Lets the agent submit without the person clicking |
Each field’s existing name attribute becomes the parameter name. So a field called make becomes a parameter called make. Also, Chrome’s documentation notes that removing either toolname or tooldescription unregisters the tool.
Step 1: Start with a working form
First, make sure the form works normally for people. The WebMCP declarative API adds a layer on top; it doesn’t replace anything. Here is a simple car search form, similar to the example in the explainer:
<form action="/search" method="get">
  <input type="text" name="make" required>
  <input type="text" name="model" required>
  <button type="submit">Search</button>
</form>
Step 2: Name and describe the tool
Next, add toolname and tooldescription to the form. Above all, pick a name that says exactly what happens. Chrome’s best practices suggest precise verbs, such as create-event rather than start-event-creation-process.
<form action="/search" method="get"
      toolname="search-cars"
      tooldescription="Search for cars by make and model">
Keep the description short and positive. Chrome’s security guidance suggests tool descriptions under 500 characters and names under 30 characters. Its best practices also advise describing what a tool can do, rather than listing what it can’t.
Step 3: Describe each field
Then, add toolparamdescription to each field. This tells the agent what to put in the box. In fact, examples help a lot.
<input type="text" name="make" required
  toolparamdescription="The vehicle's make, for example BMW or Ford">
<input type="text" name="model" required
  toolparamdescription="The vehicle's model, for example 330i or F-150">
Chrome’s guidance suggests parameter descriptions under 150 characters. It also recommends plain words over codes. For example, a shipping field should accept “Express” rather than an ID number such as 1.
Step 4: Decide whether the agent can submit
This is the most important choice, because it decides who has the final say. Without toolautosubmit, the agent fills in the form but stops there. According to the explainer, the browser then focuses the submit button, and the person has to click it. In other words, the human confirms.
If you add toolautosubmit, the agent can submit on its own. That suits low-risk actions, such as running a search. However, for anything that sends a message, books a slot or spends money, leave it off. That way, the person always has the final say.
<form action="/search" method="get"
      toolname="search-cars"
      tooldescription="Search for cars by make and model"
      toolautosubmit>
Step 5: Return a result from the declarative API
After submission, the agent needs to know what happened. The WebMCP declarative API offers two routes, according to the explainer.
For forms that don’t leave the page, your JavaScript can call respondWith() on the submit event. Chrome’s documentation says you must call preventDefault() first. The event also has an agentInvoked property, so your code can tell whether an agent or a person submitted the form.
form.addEventListener('submit', (event) => {
  if (event.agentInvoked) {
    event.preventDefault();
    event.respondWith(runSearch(new FormData(form)));
  }
});
For forms that load a new page, the explainer says the first <script type="application/ld+json"> block on the result page serves as the tool’s response. So structured data on your results page can double as the agent’s answer.
Step 6: Show people what the agent is doing
Transparency matters too, because the person should see when an agent is using a form. Chrome supports two CSS pseudo-classes for this:
:tool-form-activematches a form while an agent is using it.:tool-submit-activematches that form’s submit button.
For example, you could outline the form while the agent fills it in:
form:tool-form-active {
  outline: light-dark(blue, cyan) dashed 1px;
}
In addition, the page receives toolactivated and toolcancel events. Chrome’s documentation says toolcancel fires when the person cancels or the form is reset. You can use these events to show a message such as “Your assistant filled in this form. Please check and submit.”
Where the WebMCP declarative API fits best
The declarative approach suits forms that are simple, common and low risk. Chrome’s use-case guide gives several examples. For instance, it describes a car buyer who wants a seven-seat car that runs on regular fuel. An agent could fill in the dealer’s search form with those details, while the buyer checks the results.
Similarly, the guide mentions timesheets for contractors, warranty claims and event enquiries. In each case, the form already exists. Therefore, adding a name and a few descriptions is far cheaper than building a new system.
By contrast, the declarative approach is a poor fit for complex, multi-step tasks. A checkout with several screens, or a design tool with many options, needs JavaScript and careful tool design. For those, the imperative API gives you more control.
A good rule of thumb, then, is this. If a person can complete the task by filling in one form and pressing one button, the WebMCP declarative API is worth a look. If not, plan for the imperative API instead.
Step 7: Test before you rely on it
Finally, test your tool. Chrome’s documentation lists two routes. For local testing, enable chrome://flags/#enable-webmcp-testing. For real visitors, register for the origin trial from Chrome 149. Then install Google’s Model Context Tool Inspector extension, which lets you see registered tools and run them by hand.
Chrome also publishes a demo called Le Petit Bistro, which uses the WebMCP declarative API for a restaurant booking form. It is a useful model to study. We cover testing in more depth in our WebMCP best practices guide.
Limitations of the WebMCP declarative API
The WebMCP declarative API is appealing, but it has clear limits in September 2026:
- The spec is unfinished. The draft specification says its declarative section “is entirely a TODO.” The explainer also says the exact rules for turning form fields into a schema are still to be decided.
- Not every agent supports it. ChatGPT’s developer notes say declarative HTML tools aren’t currently supported in its site tools. It only uses JavaScript-registered tools.
- Mozilla prefers the other approach. In its standards position, Mozilla said it favoured the imperative API over the declarative one.
- Browser support is experimental. Chrome and Edge are in origin trials, and Safari’s WebKit team is opposed. See our WebMCP browser support tracker.
So, is it worth adding now? It depends on the form. For a simple search or enquiry form, the attributes are cheap to add and harmless to browsers that ignore them. However, don’t build anything important on the assumption that every agent will use them.
A quick WebMCP declarative API checklist
- The form works normally without any agent.
toolnameis short, specific and uses a clear verb.tooldescriptionsays what the tool does, in under 500 characters.- Every field has a
nameand atoolparamdescription. toolautosubmitis only used for low-risk actions.- The page shows people when an agent is filling the form.
- The result page or
respondWith()gives the agent a clear answer.
Key takeaways
- The WebMCP declarative API turns an HTML form into an agent tool using four attributes: toolname, tooldescription, toolparamdescription and toolautosubmit.
- Without toolautosubmit, the agent fills the form and the person must click Submit, which keeps a human in control.
- Results come back through SubmitEvent.respondWith() or, for navigating forms, the first JSON-LD block on the result page.
- CSS pseudo-classes and events let you show people when an agent is using a form.
- As of September 2026 the spec section is unfinished, and ChatGPT’s site tools don’t support the declarative approach.
WebMCP declarative API: FAQs
Not for the basic tool. You add attributes to an HTML form. JavaScript is only needed if you want to return a custom response with respondWith() or react to agent events.
It lets the agent submit the form without the person clicking Submit. Without it, the browser focuses the submit button and waits for the person to confirm.
Not as of September 2026. ChatGPT’s developer notes say its site tools use JavaScript-registered tools and don’t support the declarative HTML approach.
Browsers that don’t support WebMCP should ignore unknown attributes, so the form keeps working normally. Still, test your form after any change.
Sources
- Chrome for Developers, “Declarative API” (updated May 18, 2026)
- webmachinelearning, “Declarative API explainer” (accessed September 2026)
- W3C Web Machine Learning Community Group, Draft Community Group Report (September 26, 2026)
- Chrome for Developers, “Use cases” (updated May 18, 2026)
- Chrome for Developers, “Best practices” (updated May 18, 2026)
- Chrome for Developers, “Secure your tools” (updated September 1, 2026)
- Chrome for Developers, overview page (updated August 7, 2026)
- ChatGPT Learn, “Site tools” developer guide (accessed September 2026)
- Mozilla, standards position issue #1412 (accessed September 2026)